
How To Paint With Limewash: Technique Guide and AI Preview Tips

Painting with lime wash turns flat, ordinary walls into surfaces with quiet depth, the kind of soft cloudy variation you notice at dusk rather than at noon. The technique is centuries old, but the materials and the patience are still the same: mineral pigment, water, a wide brush, and a willingness to let the finish *settle into itself*. Whether you mix authentic limewash or fake the look with two cans of matte paint, AI Renovation lets you preview the finish in your actual room before you commit to a single coat. Plan on an intermediate skill level and a full weekend.
What you'll need before you start
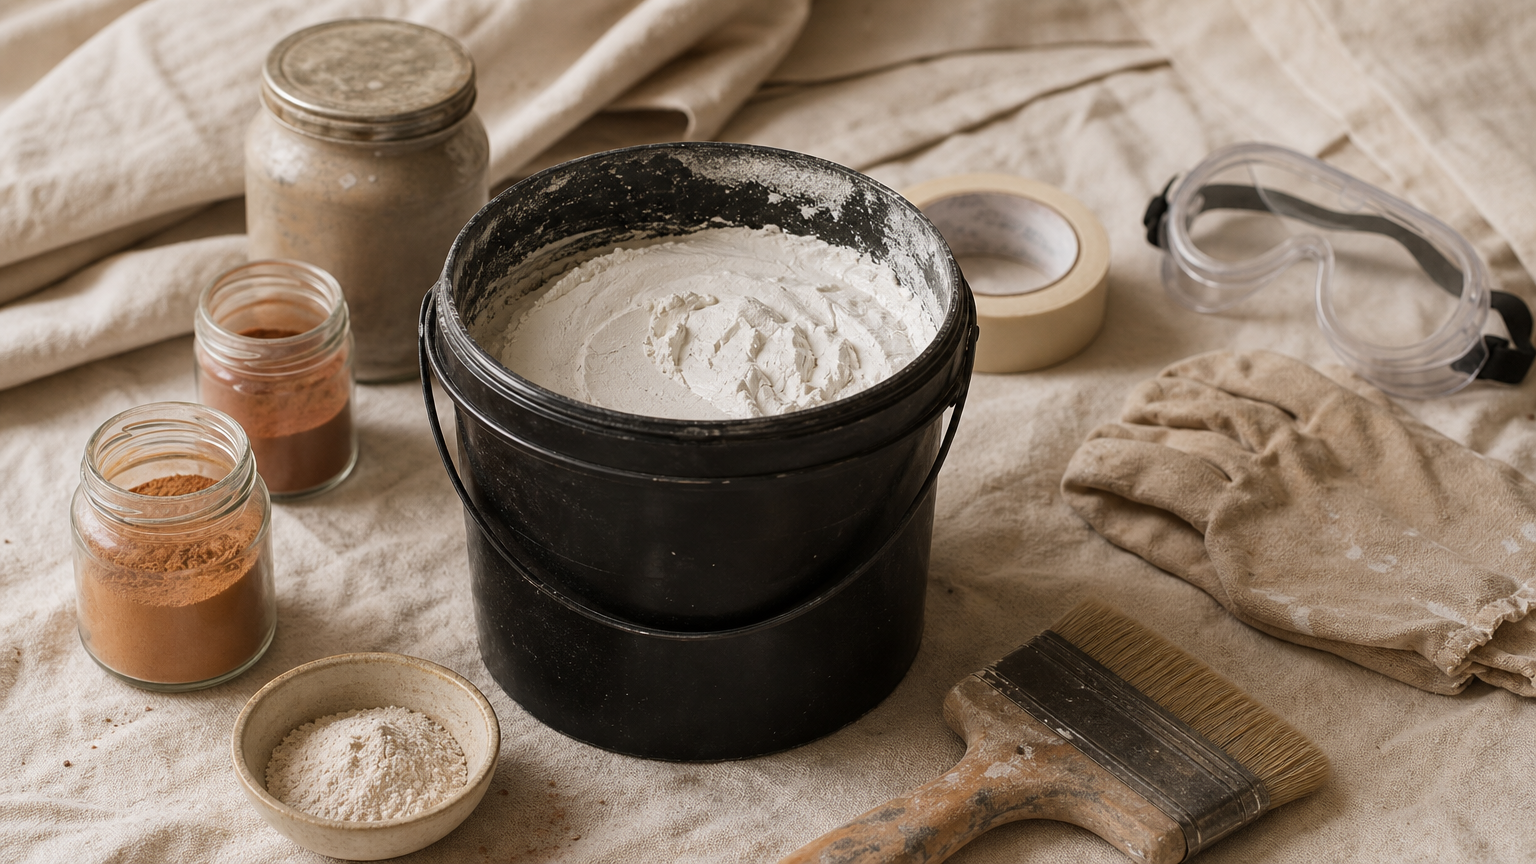
Limewash is forgiving on the wall and unforgiving on the prep table. Gather your materials in two piles, depending on whether you are mixing the real thing or faking it with paint, and stage your drop cloths before you ever crack a lid. Most homeowners using the AI home renovation workspace sketch a shopping list straight off the preview render.
Materials for authentic limewash
- Lime putty (preferred) or hydrated lime powder. Powdered quicklime can work, but it must be slaked in water for several days, ideally two weeks, before use.
- Clean water, ideally cool, for thinning to consistency.
- Mineral pigments matched to your target shade. Earth oxides and ochres behave most predictably.
- A 5-inch or wider masonry brush, plus a smaller brush for cut-ins.
- Painter's tape, canvas drop cloths, nitrile gloves, splash goggles, and a dust mask. Quicklime is caustic; treat it that way.
- A dedicated lime-prep primer for drywall. Raw plaster and unsealed masonry usually accept limewash with no primer at all.
Materials for a faux limewash finish
For the budget-minded faux approach, you need two matte-finish paint colors pulled from the same paint chip, one tone apart. Bright, saturated hues read as costume; muddy greens, warm putties, and dusty terracottas read as the real thing. Add the same wide brush, a clean dry brush or barely damp cloth for blending, painter's tape, and an optional primer if your walls have stains or sheen.
Takeaway: Real limewash is a mineral product with mineral hazards; faux limewash is two cans of flat paint and a wide brush. Pick the path before you shop.
Before you start: surface prep and what can go wrong

Most limewash failures are written into the wall before the first coat is mixed. A quick render in AI Renovation's design tool won't fix bad prep, but it will help you decide whether the wall is worth the work in the first place.
Choosing the right surface
Limewash bonds to porous substrates: lime plaster, unsealed masonry, raw brick, and properly primed drywall. According to James Alexander Limewash's application guide, four distinct systems cover most projects, including interior drywall, high-contact drywall, non-sealed masonry, and sealed masonry, each with its own primer and topcoat. Glossy paint, sealed concrete, and slick tile need mechanical abrasion or a bonding primer before lime will hold. Some brands, including Color Atelier, specify an acrylic primer on every surface they limewash regardless of interior or exterior use; the primer compatibility notes in our reno guides are worth a skim before you buy.
Common prep mistakes to avoid
- Skipping the wipe down. Dust, kitchen grease, and old hand oils kill adhesion. Run a soft dust brush or a damp cloth over the whole wall first.
- Testing only when wet. Limewash dries dramatically lighter than it looks in the pot. Always brush a hidden test patch and judge it the next day.
- Mixing pigment in the can without proofing. Red oxides may need a quarter of the volume that green earth requires for the same depth. Test each color separately in small pots and let them set for several hours.
- Painting over damp drywall mud. Fresh patches need to cure fully or the wash will flash a different shade.
Takeaway: Treat the wall like a substrate test, not a canvas. The finish is only as honest as the surface under it.
Step-by-step: how to paint with limewash

This is the core sequence for interior drywall, the most common starting point. Higher-contact rooms add a densifier and an optional matte sealer at the end. If you want to compare the finish to a different palette mid-project, the AI Renovation create page lets you swap colors on the same room photo without lifting a brush.
Step 1: Mix your limewash to the right consistency
Whisk lime putty into water until it looks like whole milk. The Mud Home's guidance is to worry less about ratios and more about consistency: the primer coat should be more watery so it can sink into the wall, the second coat slightly thicker, and the top coat thinned out again. Stir pigments in slowly, taste-testing each pot on a scrap board before scaling up.
Step 2: Apply the primer coat
Load the wide brush, knock off the excess, and lay the first dilute coat in long irregular strokes. Verification: the wall should look wet and streaky, not opaque. This coat is a bond layer, not a finish. Move quickly so you don't leave hard edges where one section meets another. The interior design preview is helpful here for double-checking that you've picked the right tone before the wall starts carbonating.
Step 3: Apply subsequent coats with the cross-hatch technique
Once the primer coat is fully dry, mix a slightly thicker batch and brush it on in overlapping X-pattern strokes. While the section is still wet, feather lightly with the same brush to soften the seams. James Alexander's standard interior drywall system calls for two to three coats over the lime-prep primer; that is what builds the soft, layered look. If you want a side-by-side comparison of two coats versus three, render both versions in your room before committing to a third lap.
Step 4: Add a densifier or sealer if needed
For hallways, stairwells, and any wall a child or dog will touch, mix a densifier into the final limewash coat to reduce chalkiness. A matte sealer can go over the densified surface to make it wipeable, but it can shift the color and make future touch-ups visible. Mock up a sample board first; previewing the sealed finish digitally is faster than repainting a hallway.
Takeaway: Thin, thicker, thin again. Cross-hatch, blend, and densify only where hands will land.
Faux limewash technique using standard paint
When budget or availability rules out a true mineral product, two cans of matte paint and a wide brush can carry the look surprisingly far. The faux finish walkthrough approach is forgiving for first-timers and easy to reverse.
Selecting your two paint colors
Pull a paint chip and pick two adjacent tones, one as your base, one a single step lighter or darker. Natural, earthy, or muddy hues read as authentic limewash; saturated brights do not. Matte is non-negotiable. Any sheen in either can will betray the chalky, mineral effect the technique is chasing. Browse the AI Renovation explore feed for palette pairings other homeowners have rendered before you walk into the paint store.
Applying the faux finish
Roll or brush the primary color across the wall as a flat base coat and let it dry overnight. Load the wide brush with the secondary color, knock most of it off on the rim, and work in irregular crisscrossing strokes; while it is still slightly tacky, soften the edges with a dry brush or barely damp cloth. The look you want is *cloud, not stripes*. Faux limewash does not breathe, regulate moisture, or carry the antimicrobial properties of mineral lime, but it is widely available and far cheaper. For a quick sanity check on whether the two tones will read together, the renovation preview workspace is the fastest way to see them on your actual walls.
Takeaway: Two matte tones, one wide brush, irregular strokes, soft edges. No sheen, ever.
Using AI to preview limewash before you paint

Limewash shifts with light. A wash that reads warm and chalky in north-facing morning light can turn ashy and cold by late afternoon, which is exactly why a digital preview matters more here than for ordinary flat paint. Upload a photo of the room to an AI room visualizer and render the finish before any pigment is purchased.
A preview helps answer the questions a paint chip cannot: does this tone read too warm against the oak floor, too cool next to the existing curtains, too stark against the white trim? For large open-plan walls or exterior brick, where a multi-coat limewash project burns through a weekend and a meaningful chunk of budget, AI exterior design previews are worth the few minutes they take.
Digital previewing is also useful for the authenticity question. Render the mineral limewash palette next to a faux two-paint version in the same room photo and you can see the trade-off between budget and breathability before the receipt is printed.
Takeaway: Preview the wash in your own light, in your own room, against your own floor. Paint chips lie; rendered rooms do not.
Troubleshooting common limewash problems
A short field guide for the moments the finish does not behave. For deeper context the AI Renovation features page outlines which tools help diagnose surface issues from a photo.
- Symptom: Finish looks chalky or powdery after drying. Cause: Insufficient binder or densifier in the mix. Fix: Apply a diluted densifier coat over the dried surface and let it cure fully before touching.
- Symptom: Limewash peels or flakes within weeks. Cause: Non-porous or glossy substrate without adequate primer. Fix: Strip the affected section, apply a bonding primer rated for mineral finishes, and recoat.
- Symptom: Color dries far lighter than the wet swatch. Cause: Lime carbonates as it cures and naturally lightens. Fix: Add one more coat with slightly higher pigment concentration. Always test on a hidden section first.
- Symptom: Streaks or brush marks refuse to blend. Cause: Paint dried too fast or the brush is too small. Fix: Mist the wall lightly with water before the next coat and switch to a brush at least 5 inches wide.
- Symptom: Sealer has darkened the wall or added sheen. Cause: Matte sealer applied over un-densified limewash. Fix: Always densify the coat below the sealer, and run a full mock-up on a sample board before sealing the whole wall.
Takeaway: Most limewash problems trace back to substrate, consistency, or skipping the test patch. None of the fixes require starting over.
Frequently asked questions
How many coats of limewash do you need to apply?
Most interior drywall projects use two to three limewash coats over a lime-prep primer. Exterior masonry can take three to four. Test on a hidden patch and judge the dried result before committing to a final coat count.
Can you paint limewash over regular painted walls?
Yes, but only after preparation. Glossy or satin paint must be scuffed and primed with a bonding primer compatible with mineral finishes. Flat, fully cured paint usually accepts a dedicated lime-prep primer, then standard limewash coats on top.
What is the difference between limewash and regular paint?
Limewash is a mineral finish of slaked lime and water that carbonates onto the wall and breathes. Regular paint is a binder-and-pigment film that sits on the surface. Limewash offers texture and depth; standard paint offers uniform color and easier cleaning.
Does limewash wash off in rain if used outside?
Properly cured exterior limewash bonds chemically with masonry and weathers gradually rather than washing off. The first 24 to 48 hours after application are the vulnerable window; avoid rain in that period and limewash will last years, slowly mellowing with age.
How do you mix limewash paint for the right consistency?
Whisk lime putty or hydrated lime into water until it looks like whole milk. The primer coat is thinner and waterier, the second coat slightly thicker, and the top coat thins again. Stir often while painting to keep pigment in suspension.
Can you add color to limewash, and what pigments work best?
Yes. Use lime-stable mineral pigments such as iron oxides, ochres, umbers, and earth greens. Synthetic dyes and standard colorants will fade or react. Pigment ratios vary widely by color; test each shade in a small pot and judge it dry.
How long does limewash take to dry between coats?
Plan on roughly four to six hours between coats in average indoor conditions, and a full 24 hours before judging final color. Humid weather and cold rooms extend the wait. Never recoat a section that still feels cool or damp.
Is limewash paint safe for interior use?
Authentic mineral limewash is non-toxic once cured and is naturally antimicrobial and breathable, which makes it well suited to bedrooms, living rooms, and even nurseries. Wet lime is caustic, so wear gloves, goggles, and a mask during mixing and application.
Bringing the finish home
Limewash rewards patience: the right substrate, the right consistency, the right brush, and the willingness to let two or three thin coats do the work of one thick one. Whether you mix true mineral lime or build the look from two matte paint chips, the technique reads best when the wall feels *quietly varied* rather than carefully decorated. Before you stir the first pot, render the room with AI Renovation and look at the finish in your own light. The wall you imagine and the wall you paint should be the same wall.
Drafted by an AI blog writer and edited before publishing.
Ready to get started? Try our Redecorate Room, or Home Redesign AI.